
使用 WSL + DevContainer 進行程式開發(二)
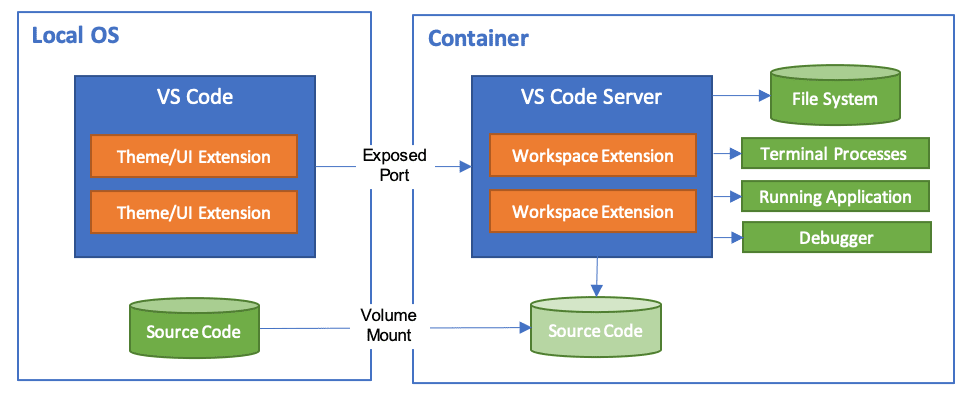
什麼是 Dev Container
是以 Docker 為基礎,將開發環境與依賴套件或工具打包成一個容器 (Container),方便使用者能夠快速建置與復原開發環境。
主要的功能如下:
- 環境一致性: 無論是在 Windows 或 Linux,只要設定好 Dev Container,同一份程式碼都可以在一致的環境下運作
- 隔離性: 可同時在一台電腦上運行多個不同語言、版本的開發環境,避免汙染本機
如何建置
事前準備
- 安裝 Docker | Docker: Accelerated Container Application Development
- 使用 VSCode + WSL
- 安裝 Dev Container 擴充套件 | Dev Containers - Visual Studio Marketplace
新增開發用資料夾
在 WSL 環境裡新增一個資料夾並進入 VSCode
1 | mkdir DevContainerTest && cd DevContainerTest |
新增 Dev Container 設定檔
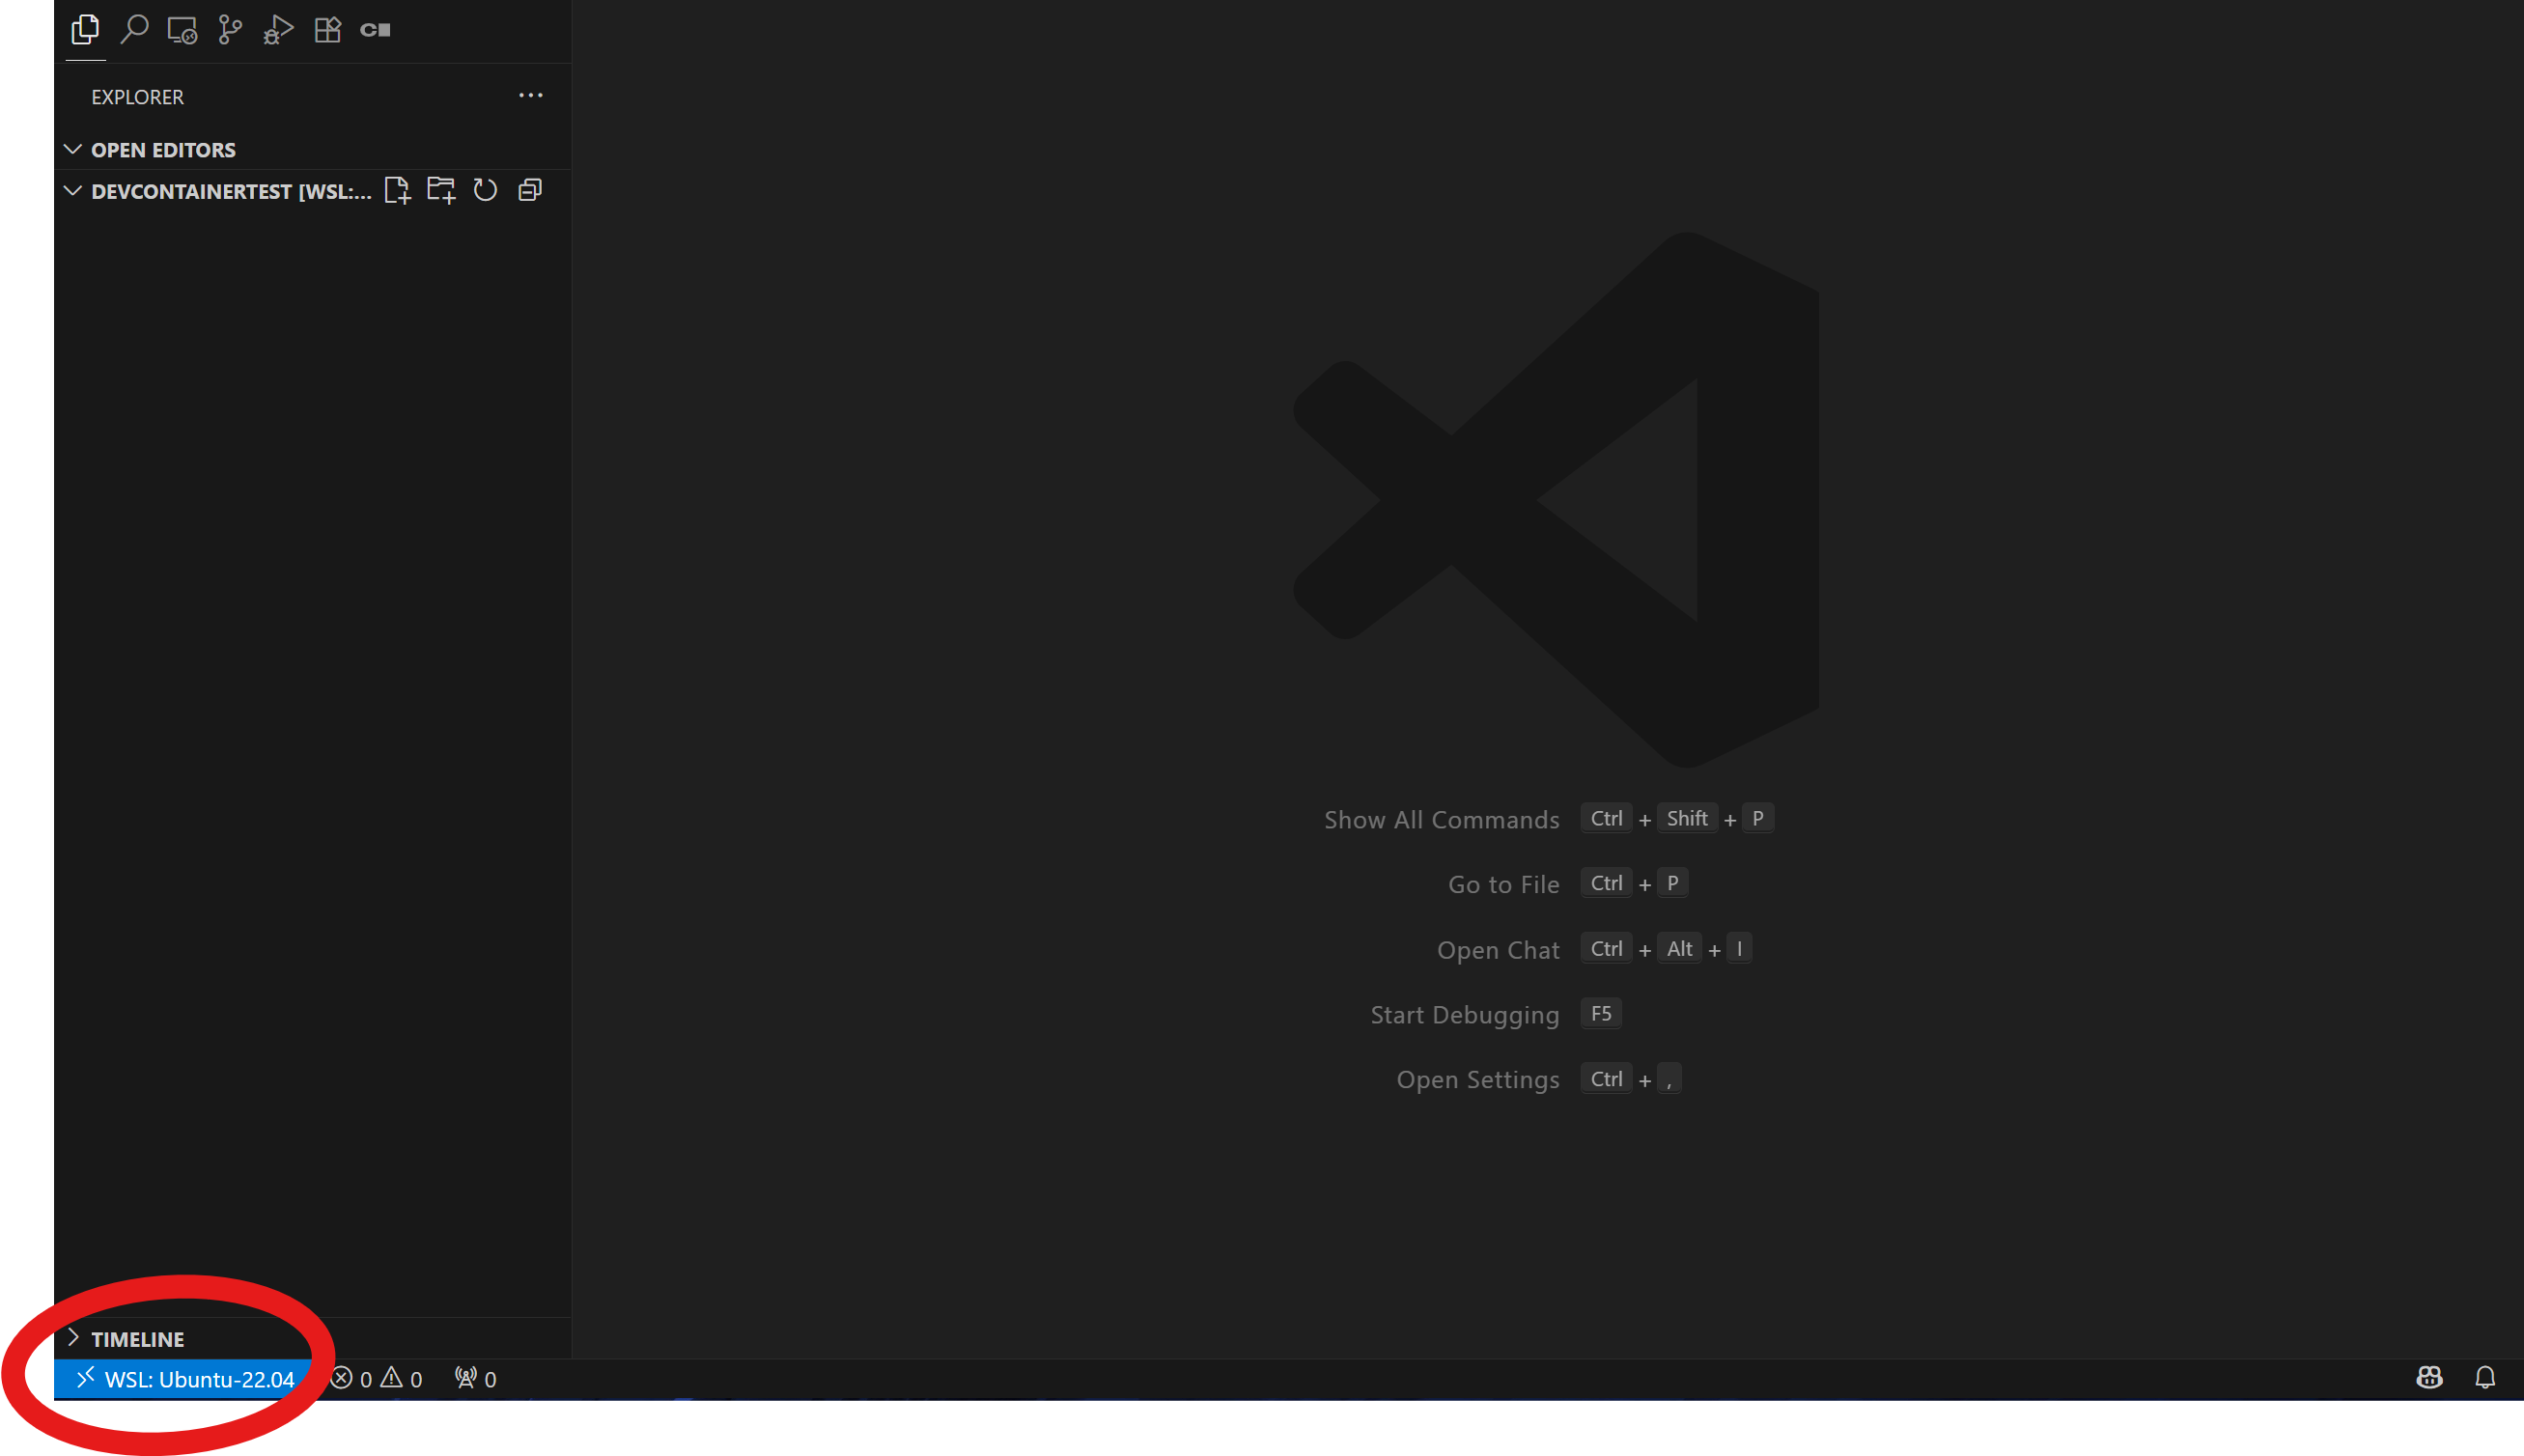
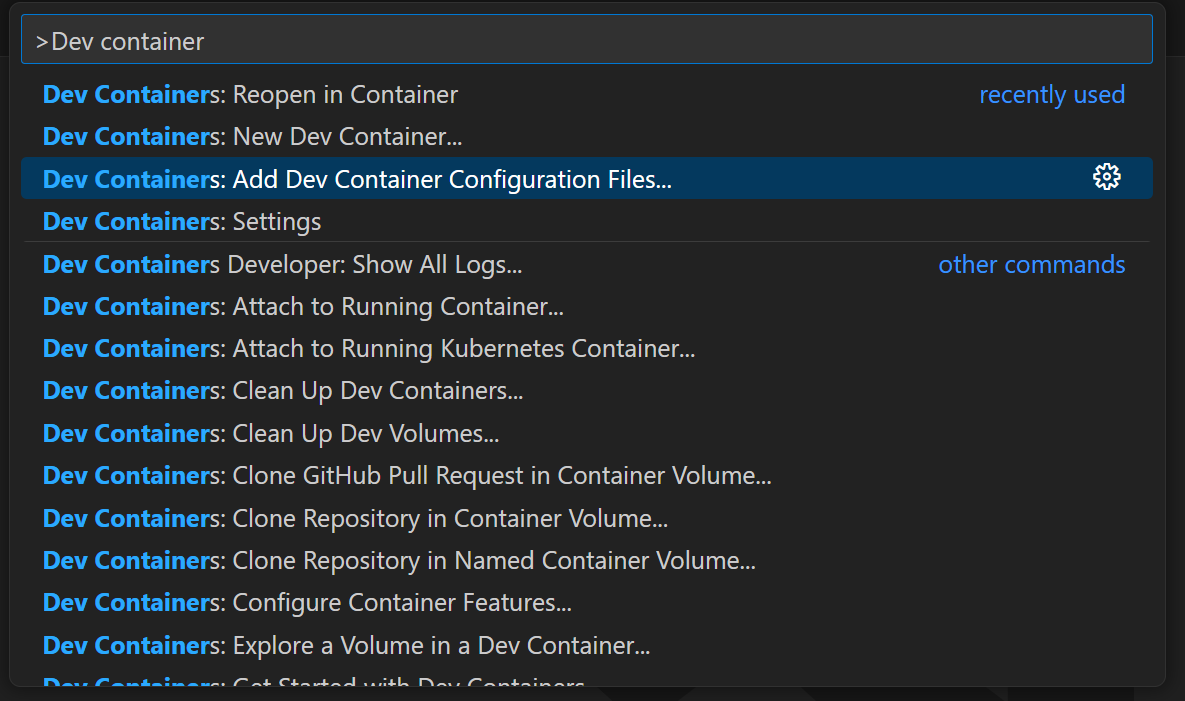
點擊 VSCode 左下角的操作選單或使用 Ctrl + Shift + P,選擇 Add Dev Container Configuration Files。
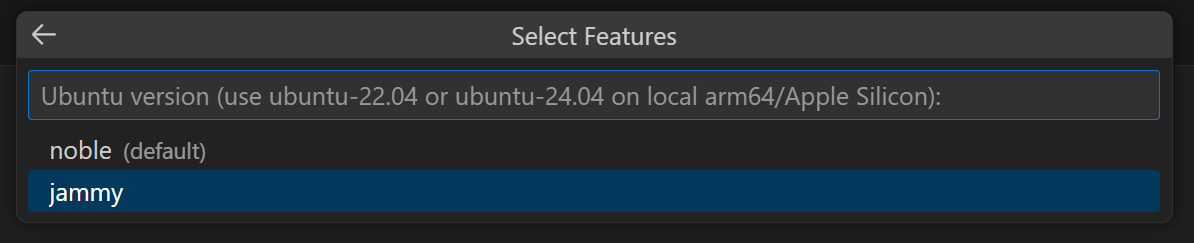
接下來選擇映像檔,為了示範我選擇 Ubuntu jammy 版本。

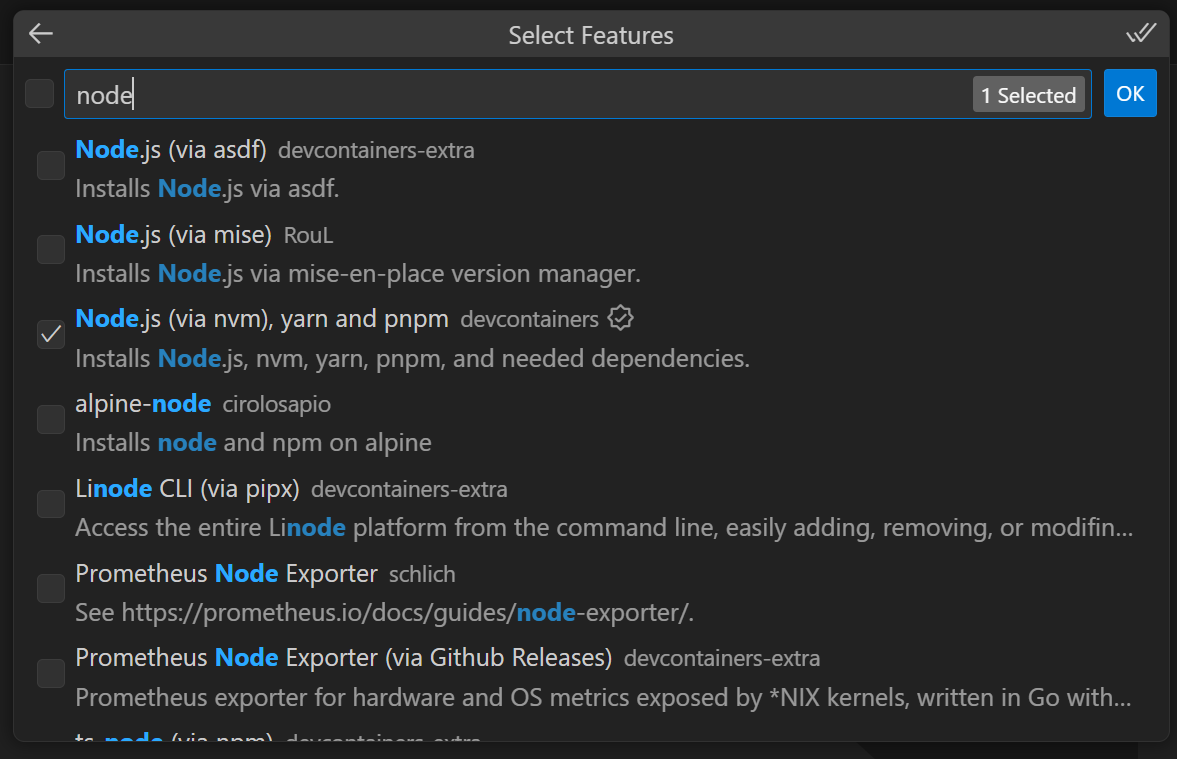
然後安裝所需的套件,這裡選擇 Node.js 套件。
接下來都按 OK 就好。


就會建立一個 devcontainer.json 的設定檔。
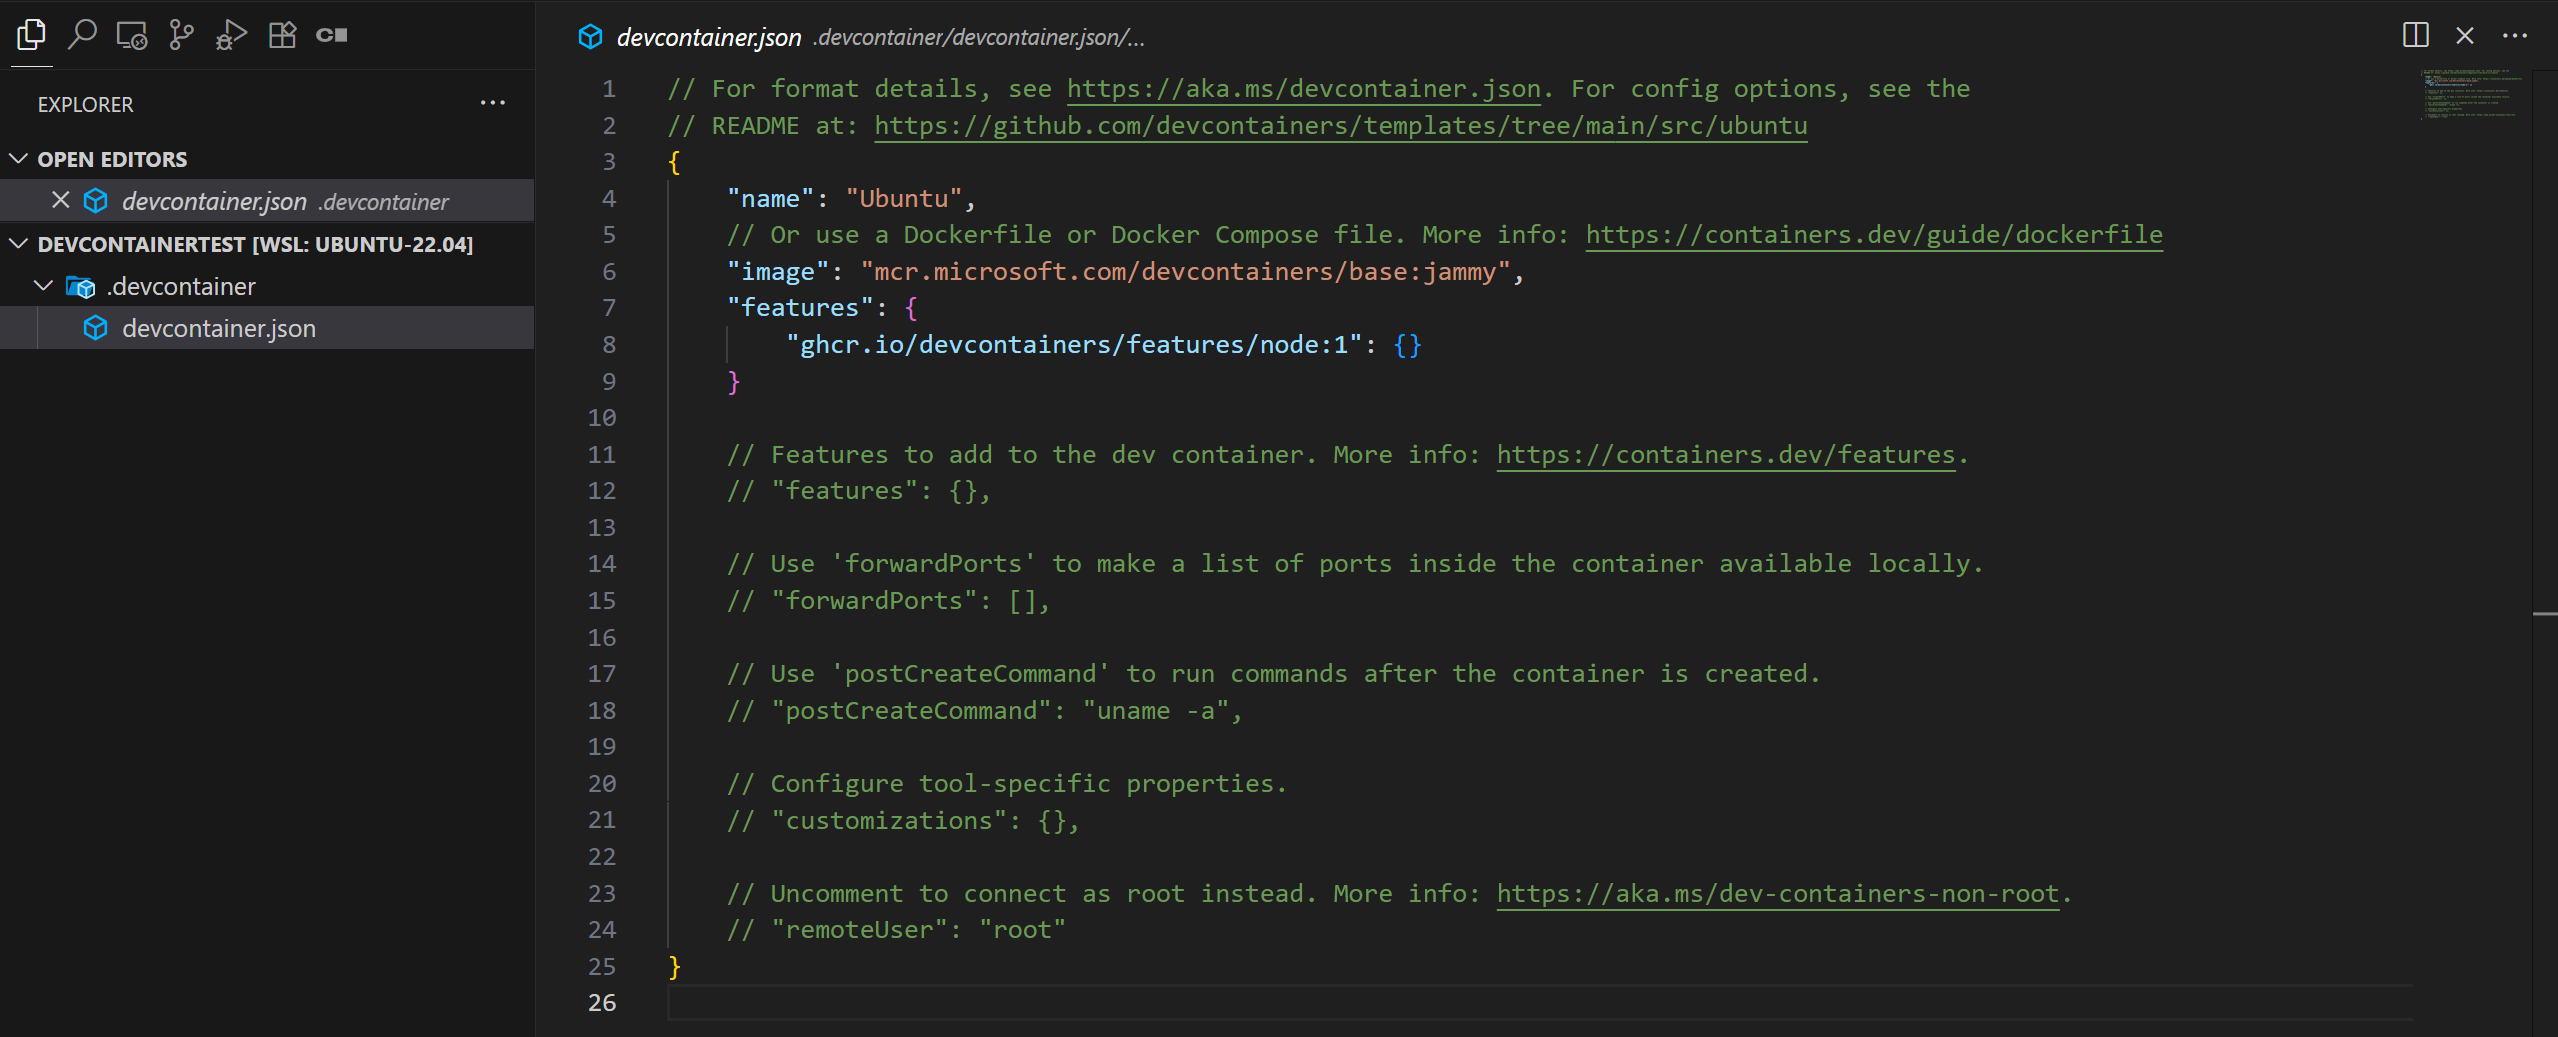
查看 devcontainer.json
設定檔由以下元素組成:
name: container nameimage: 使用 dev container 官方的映像檔如果要使用 dockerfile 或 compose 可以參考
Using Images, Dockerfiles, and Docker Composefeatures: 安裝官方提供的套件forwardPorts: 將 Container 的 port 對應到本地的 portpostCreateCommand: Container 建置完後會執行的命令customizations: 客製化設定,例如 VSCode 的擴充套件或設定參數等詳細內容,可以參考 支援工具和服務 — Supporting tools and services
remoteUser: Container 執行的身份containerEnv: Container 的環境變數
更新 devcontainer.json
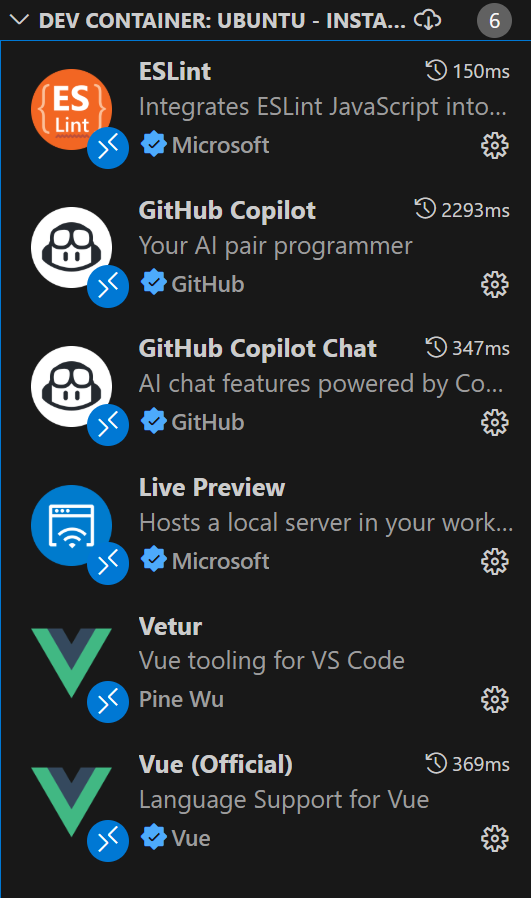
依照自己的需求來進一步的設定屬於自己開發環境,我這邊以 Vue 為例,新增常用的擴充套件。
1 | // For format details, see https://aka.ms/devcontainer.json. For config options, see the |
執行 Dev Container
設定完畢後,就可以使用 Ctrl + Shift + P,並選擇 Reopen in Container 來進入 Container

Container 建置完畢後,就可以進行環境測試。
- 檢查是否有 node 套件,以及擴充套件
1 | node -v |

開始使用開發環境進行開發
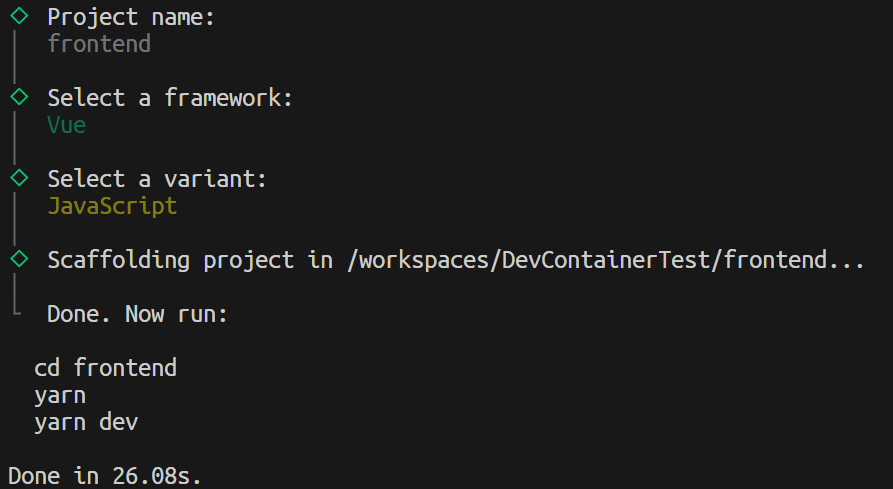
範例: 透過開發環境來建置一個 Vue 網頁
安裝 Vue 套件
1 | yarn add vue.js |
創建 Vue 專案
1 | yarn create vite |
執行專案
這樣我們就能夠透過 Dev Container 進行開發專案了~
1 | cd <project name> |
透過擴充套件 Live Preview 就能夠在側邊群組即時顯示預覽頁面。

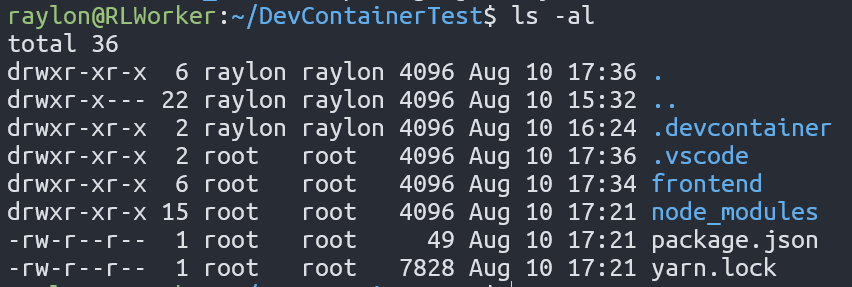
Dev Container 的所有檔案會存在該專案的目錄裡。
關閉 Container
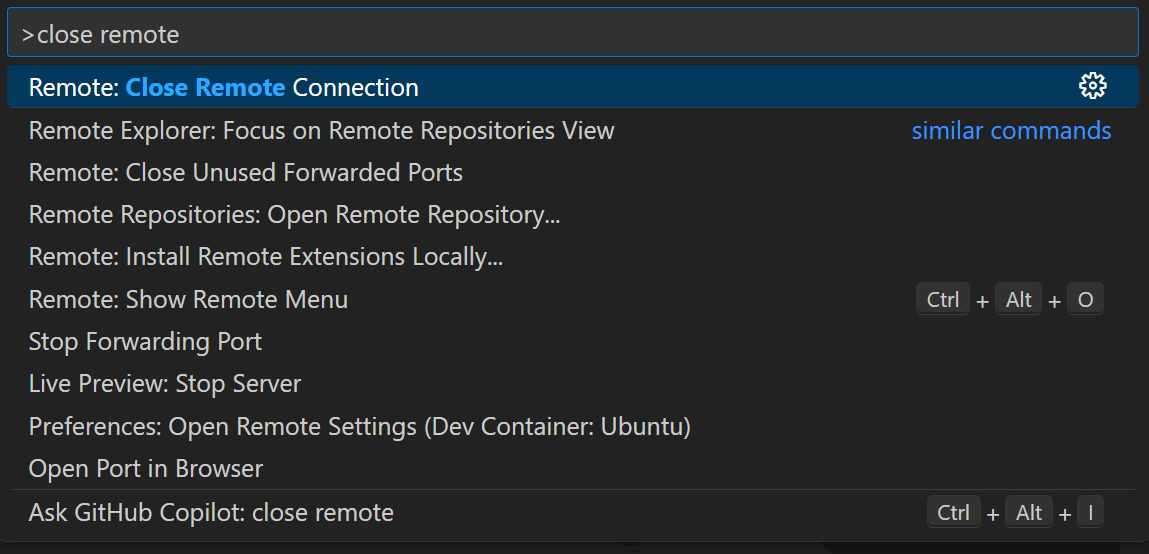
使用 Ctrl + Shift + P,選擇 Close Remote Connection就能夠退出 Container。
結論
Dev Container 不管是個人使用或在多人開發上,都大幅度的減少使用者建立開發環境所需要的時間成本,能快速重構當時的開發環境,並且也以利於後續專案維護。